How to organize your markers
Locator maps often have a lot of markers, and there are a few different features in Datawrapper you can use to organize them.
After you've added markers to your map, you'll see a full list of the markers on the left hand side, where you can select one or more markers. If you're only selecting one marker, just click on its name in the marker list.
Selecting multiple markers
If you're selecting more than one marker, there are a couple different methods of multi-selecting. Let's look at those options:
- To select all the markers you click on, hold down the Command or Control key while you click each one from the marker list.
- To select a lot of markers consecutively, you can click on a marker, and then hold down Shift while you select a different marker. That will select all the markers you've clicked on and all of the markers between the two.
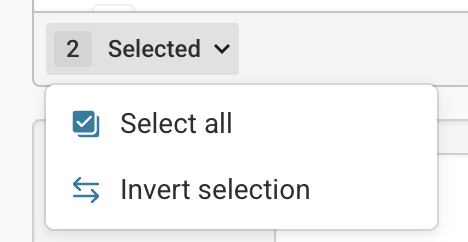
- You can also click on the Selected text from the multi-select bar underneath your markers, and choose to select all markers or invert your selection.
- Selecting a group from the marker list will also automatically select all of the children in that group!
Managing markers with the multi-select bar
When you've selected one or more markers, a gray multi-select bar will appear at the bottom of the marker list. That bar includes several helpful options for organizing and editing your markers. Let's look at them from left to right.
The first element in the multi-select bar shows you how many markers you have selected, and give you some options for selecting other markers.
To the right of that, you'll see the option to Group the markers you have selected, which you can also do via the keyboard with the shortcut Ctrl/Cmd + G. Grouping markers is helpful to make your marker list shorter and more manageable, and you can group them in whatever way makes sense to you. For example, you may want to group the markers that have already been fully styled, set aside markers that are hidden, or isolate markers based on their type.
Once you have a group of markers, you can rename that group in the menu below, or by selecting the group name again from the marker list:
If you need to separate out those markers after they've been grouped, you can ungroup markers by simply selecting the group(s), then clicking the menu icon, and clicking Ungroup.
That menu icon holds a few other commands, that will apply to all of the markers you have selected; you can hide your markers so they're not visible on the map, lock them so they cannot be moved, or delete the markers in your selection entirely.
If you delete your markers, a message letting you know how many markers were deleted will appear, which will also include a Restore button. You can click the restore button to bring the deleted marker(s) back! If you've made more edits since deleting a marker, you can also revert your changes with the Edit History feature.
In that menu, you'll also see options to Bring to front and Send to back. These are helpful for organizing your markers, to avoid having to scroll through a long list, but the order in which your markers are displayed on the list is also the order in which they're shown on your map.
The order of your markers is especially important to keep in mind for tooltips - if an area or line marker with a tooltip is layered under another marker, the tooltip for the lower marker won't be accessible. Point markers will always be layered on top of any other marker, regardless of their position in the list. To edit the order of your markers, you can drag your markers around the marker list to change their order, or use the order controls Bring to front or Send to back.
Now you know a bit more about the options to organize your locator map markers! If you have any questions or feedback, don't hesitate to reach out to us at support@datawrapper.de