How to create a workspace
Datawrapper lets you work on many kinds of projects — from team collaborations to personal explorations. Workspaces help you organize these different projects, allowing you to establish a clear boundary between what’s yours and what you share with others.
Each workspace contains its own visualizations, folders, members, and settings, so you can easily manage who you’re working with and what belongs where.
When you create your account, Datawrapper sets up your first workspace automatically. You can rename it and invite teammates, or you can also start a new one whenever your projects or collaborations grow. Creating workspaces is completely free and you can set up as many workspaces as you need.
If you are on one of our paid plans and want to continue accessing your paid plan features in your new project or collaboration, you should create a new team inside your usual workspace instead, as your subscription is associated with your workspace. You can learn how to do so here.
Create a new workspace
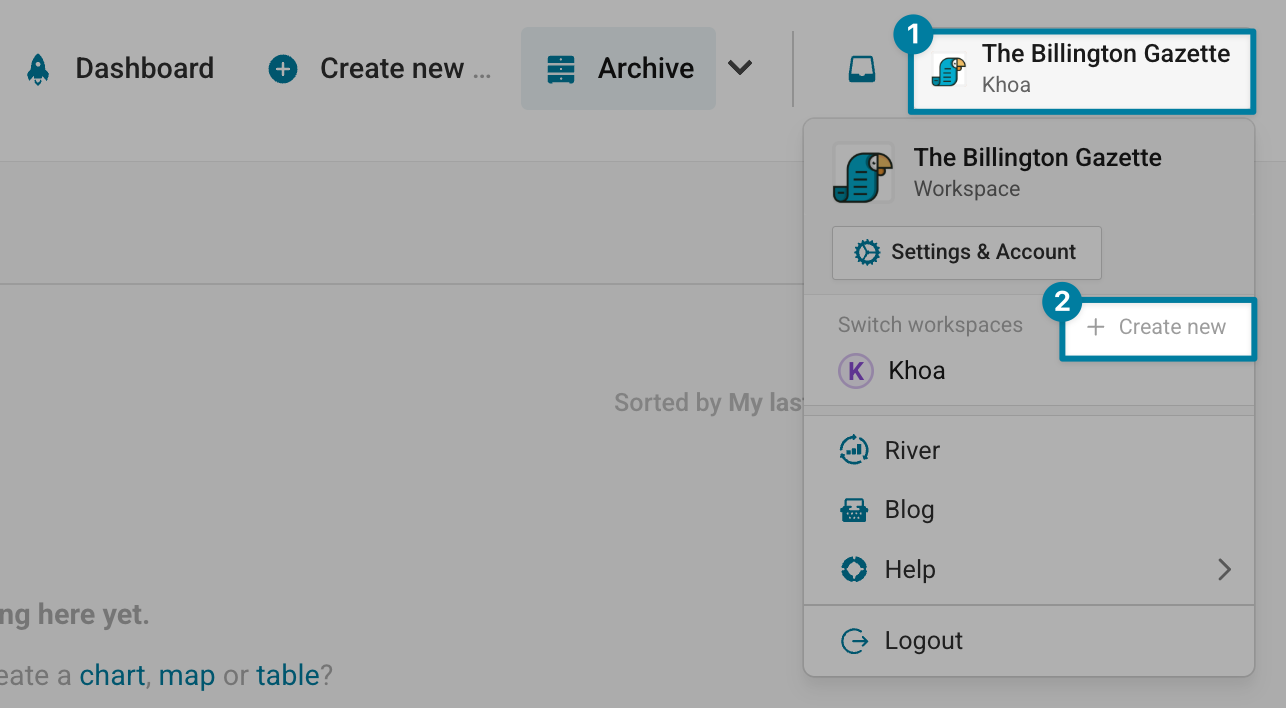
To create a workspace, hover over the workspace button ➊ in the top right corner of the window and then click on + Create new ➋:
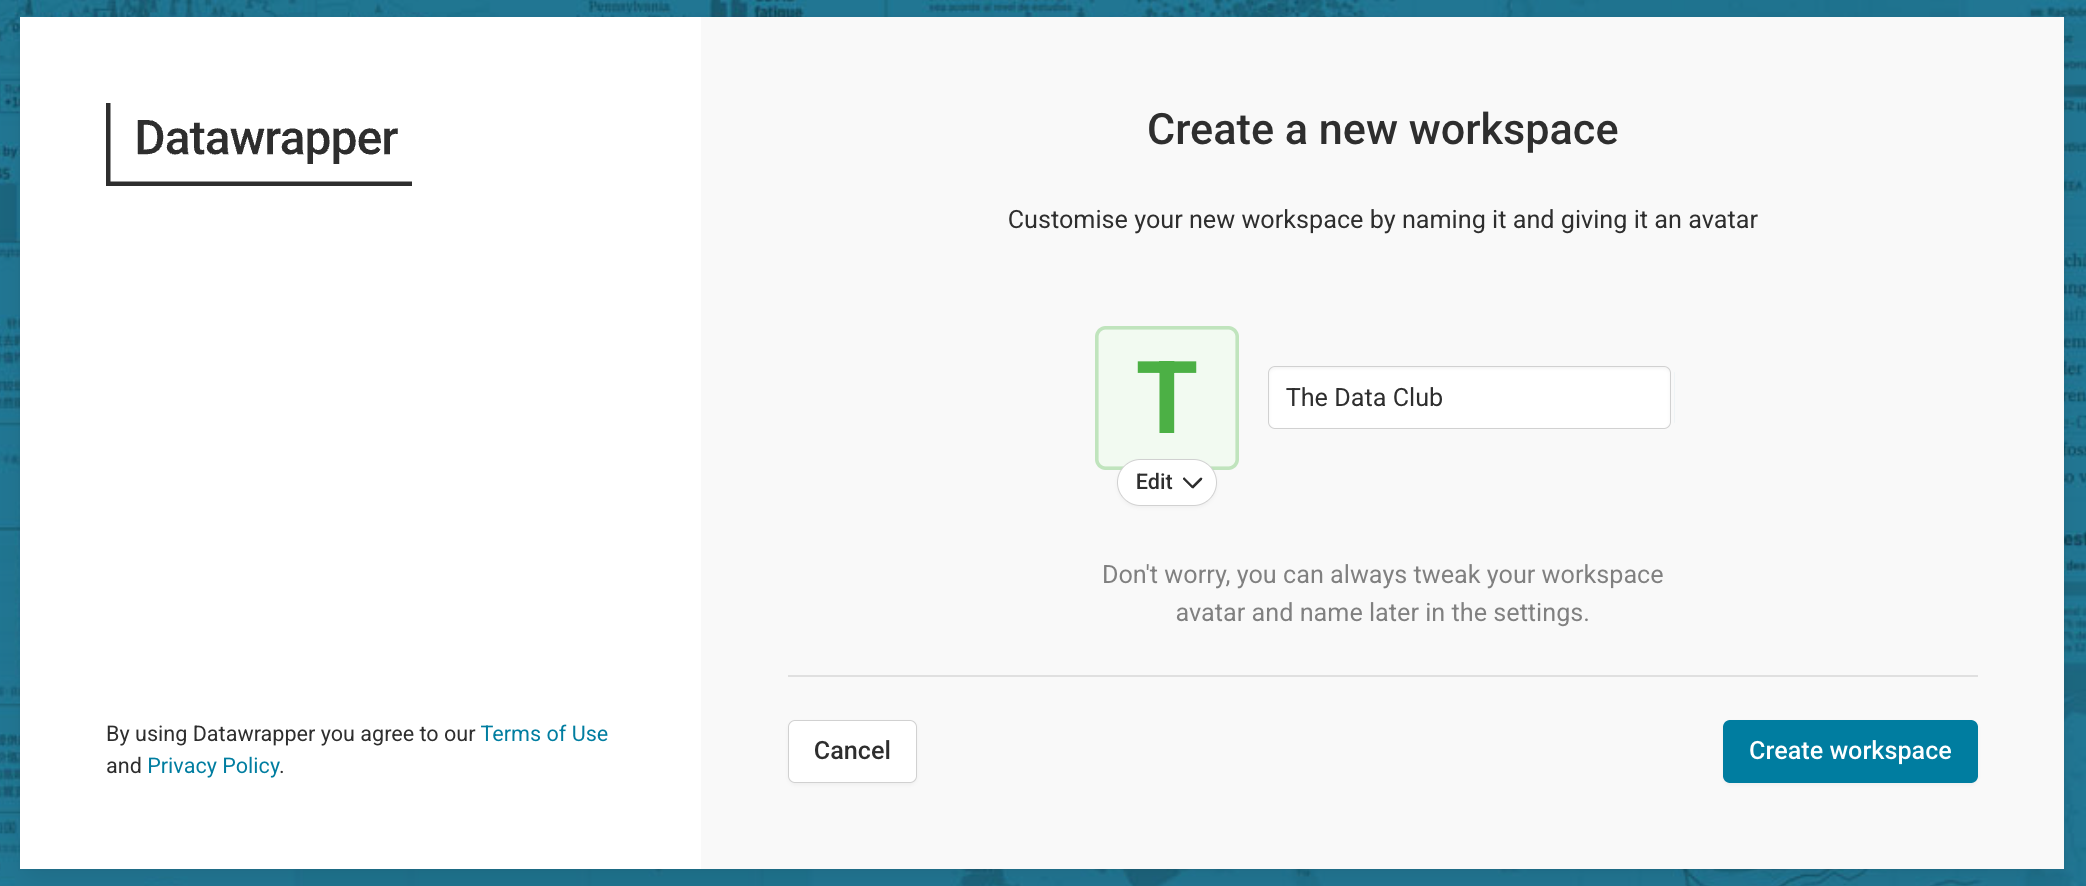
A new page will load, where you will be prompted to name your new workspace, and if you like, change the workspace icon. Once you're ready, click on Create workspace to complete the setup:
That's it! You've just created another workspace.
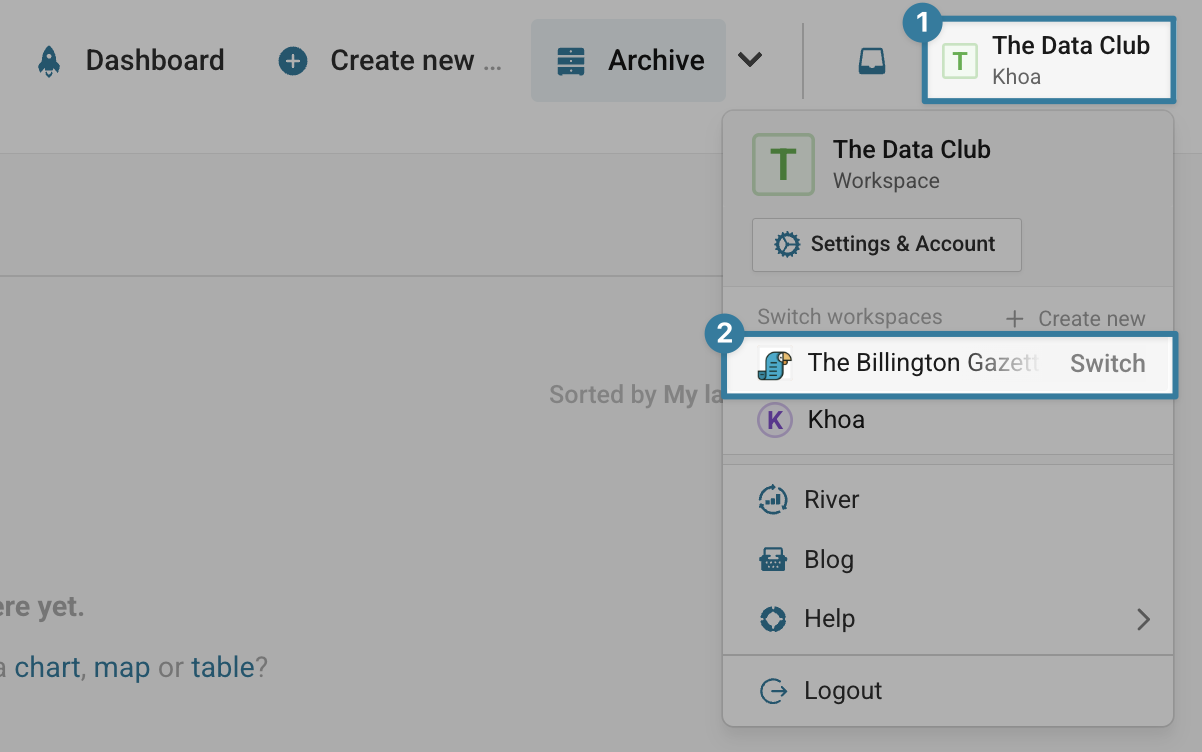
Switching to a different workspace
Switching between workspaces only takes a click in the top-right menu:
To learn more, read on here:
👉 How to manage your workspace
👉 How to add members to a workspace